DAILY DRIVER REPORT

The Check Engine Light came on, and then off, and then back on again recently on the Blacktop Bruiser 2005 5.7L Hemi RAM truck recently.
I first thought about writing an article about how to turn off that annoying Check Engine Light by covering it up with some tape. I would go in-depth on choosing the right black plastic or (electrical) tape… but, thought instead, let’s check it out and find out why the light is coming on.
I notice that it does run a bit rougher than usual. Especially when I am at a constant 1500 RPM, I can hear the engine go up and down slightly in rpm, barely noticeable on the dash.
The truck has a bit over 82,000 miles and I use it quite a bit to go all over Southern California, so I need it to be reliable. I call my brother-in-law Tim to use his diagnostic tool that you plug in under the dash and check the error codes. I find out it was P0400 sticky EGR Valve. Sure enough, one of the symptoms is a rough idle, exhaust with a funny smell, and more fuel consumption.

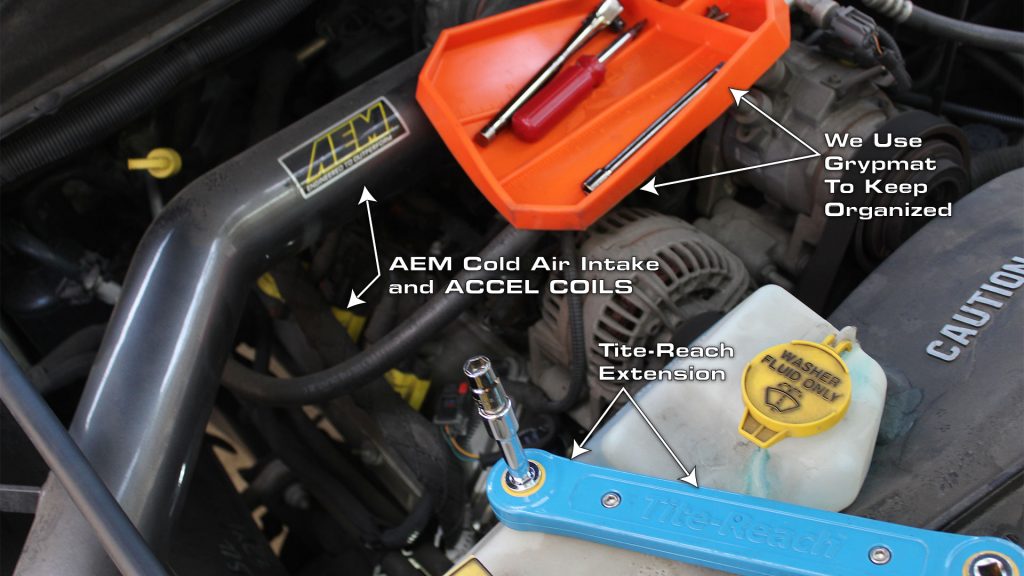
I come to find out that the EGR Valve is a simple device that allows hot exhaust gasses back into the head to burn any excess fuel a part of the wonderful emissions system. Luckily for us, the valve is located at the front of the engine and under the stock air intake ducting. The hardest part of the process is to remove all the stock ducting. Double lucky for us, we did that a few years ago when we installed the AEM Cold Air Intake System. So no removal necessary.

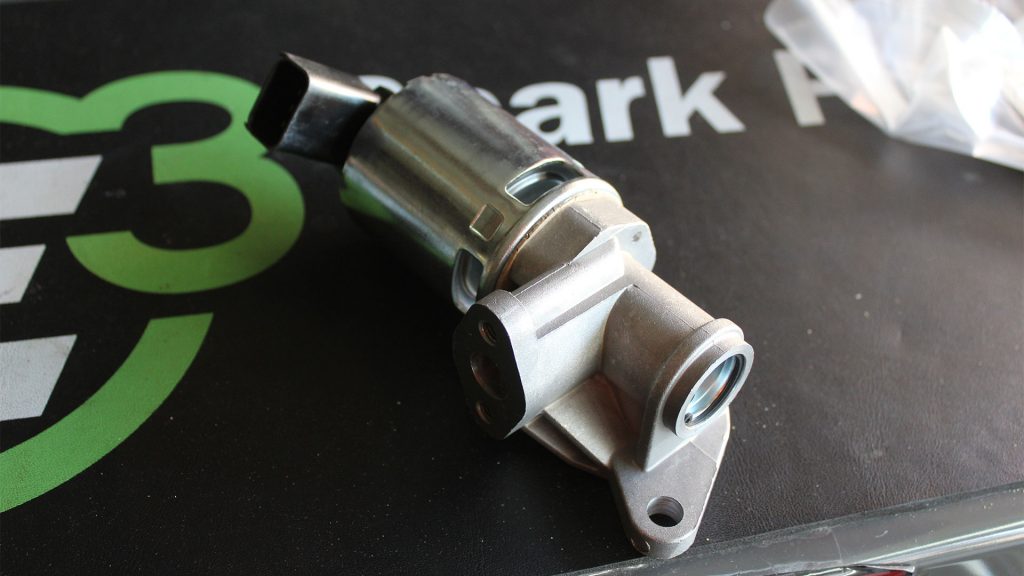
An 8 and 10mm socket is all we need with the new part in stock at my local chain auto parts store with the suggested gaskets, costing about $45.00.
OK, first of all, why didn’t I order new shocks for the hood. They have been worn out for a while now, and everytime I get under there I remember how much I need them. Good ol short stick of PVC pipe does the trick. AGAIN.
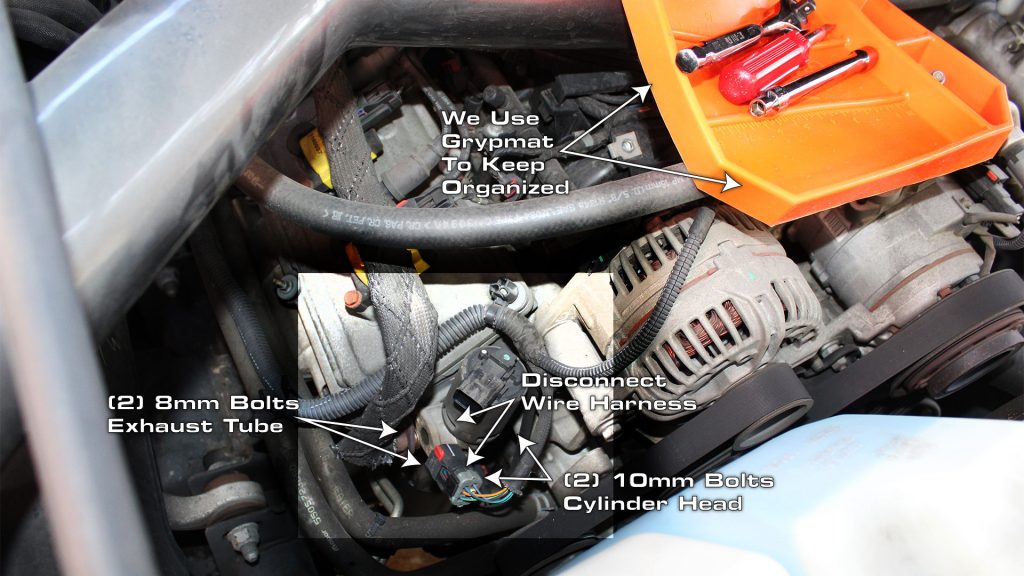
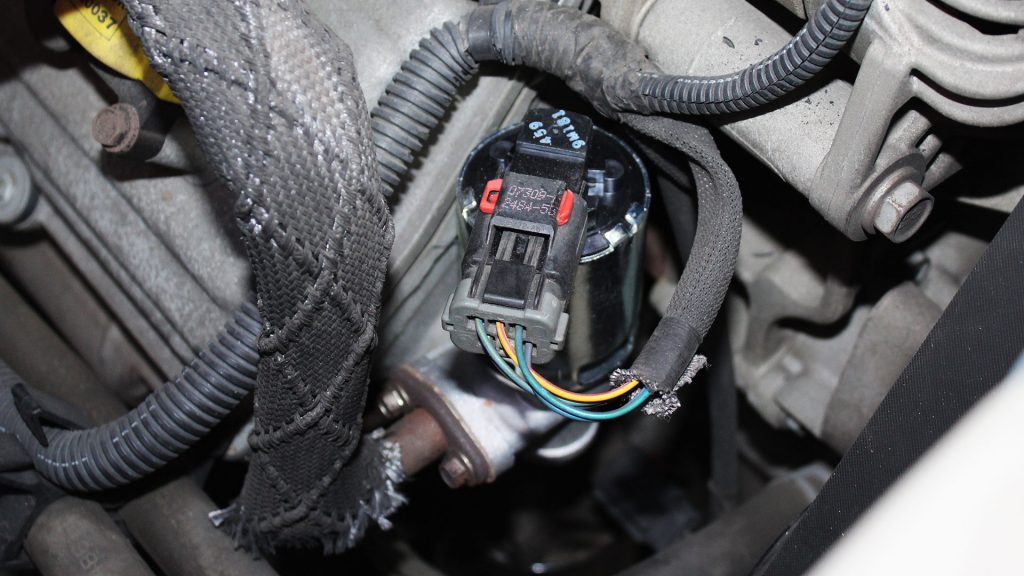
To get started I take a flathead screwdriver and carefully slide the red clip on the electrical connection then squeeze and pull the connector to remove from the top of the EGR Valve.

I take the 8mm socket and remove the tube that connects from the exhaust system to the valve. Two bolts down. Ours looked really good compared to the rusty unit on the video I saw online. The 10mm bolts that hold the valve to the front of the head are another story. Hard to find, so I reach for the MYCHANIC POD Light and get some light on the situation. A bit blind still, I look at the new part and deduce where the bolts are on the original. A quick find and the bolts break loose. This is a good time for the Tite-Reach Extension Wrench. Snake the extension down and use your ratchet above and free of any engine parts. We also use GRYPMAT to keep our work area organized as well as a pair of CATCH Gloves by Adenna to keep my hands clean.

The old part doesn’t look as nasty as the one on the video, and since the light was intermittent, it is probably going to fail completely soon, so good thing we got it out. A really cool tip I learned on the video was to pre-turn the head bolts onto the part with the metal gasket to hold it in place and keep everything lined up. That doesn’t work with the cardboard gasket for the tube intake. Although it is a bit more accessible than the head gasket.
Cinch the bolts down about hand tight on each side of the valve to the head, then go back and forth tightening each to get a consistent seal. There is a delicate balance between snug and stripped. So be careful and tighten to where it feels tight without too much force.
Install the tube to the valve with the supplied cardboard gasket and cinch down tight like you did with the head bolts. Then clip the electrical harness back on and you are ready to go. Until Billy comes over and says, hey, let’s clean this negative battery cable while we are here. So he get’s busy taking the cable off and working a wire brush all around the terminal and connector as I get the Dielectric Grease to coat the surfaces. He tightens the connector till we hear it snap. DANG KID! You got some strength. He totally twisted the bolt in half. We dig into our tupperware full of nuts and bolts and find a suitable if not better fastener.
Time to grab the PVC Pipe and close the hood.
The engine roared up through the Magnaflow 3″ Stainless tubing and the check engine light was off. A test drive proved the idle was smooth and running good.
What are you working on?
